

The mortise is the hole in one piece of lumber and the tenon is on the end of the other piece of lumber. Mortise and tenon joints can be square, rectangular or round. Because of their overall strength and appearance, mortise and tenon joints are often the chosen method of joinery in chair construction. Rails for chair backs, arms and even legs are often connected using mortise and tenon joints.
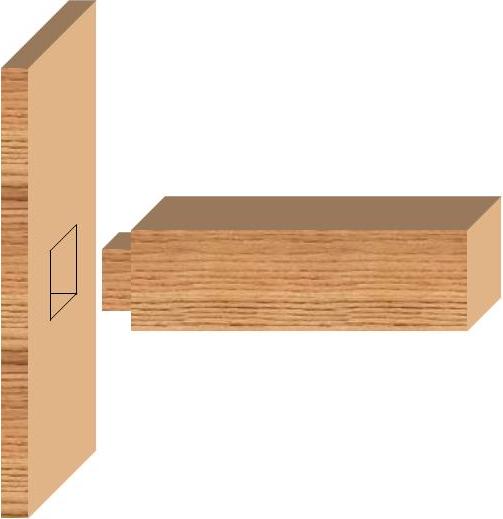
Figure 1 - Mortise & tenon joint
Mortise and tenon joints are commonly used as the method of joining dimensionally large pieces of lumber in post and beam construction. In this type of construction, the mortise and tenon joints are made using hand tools, primarily chisels and wooden mallets. Often, in post and beam construction, the mortise and tenon are blind. A blind mortise and tenon joint signifies that the tenon on one board does not proceed all of the way through the mating board. The mortise does not go all of the way through the board as well. A blind mortise and tenon is shown in Figure 2.
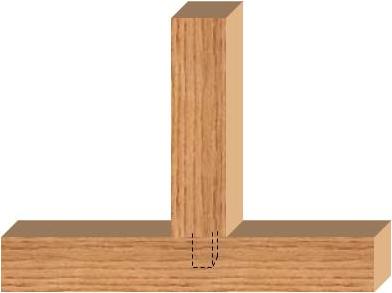
Figure 2 - Blind mortise & tenon joint
The best way to make a square or rectangular mortise is with a mortise chisel and bit, as shown in Figure 3. The mortise bit should be used in a drill press and is a wood drill bit mounted inside a hollow square piece of metal which is honed to act as a chisel and make the round hole created by the drill bit square, as the drill is pushed through the piece of wood.
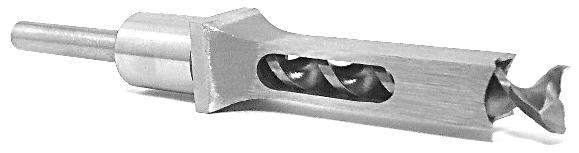
Figure 3 - Mortise chisel and drill bit
In many cases the mortise and tenon joint is only held in position with the use of an adhesive. However there are variations.
Many years ago, in order to make the mortise and tenon joint extremely strong and literally impossible to remove the mortise would be cut at an angle, and the tenon would be cut in a normal squared manner and a slit would be made through the length of the tenon, as shown in Figure 4.
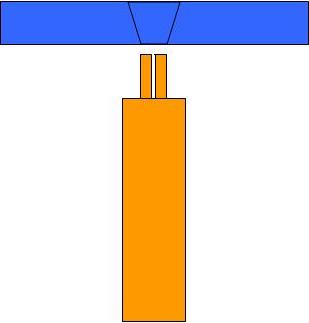
Figure 4 - Angled mortise and split tenon
Adhesive is applied to all the sides of the mortise and tenon. The tenon is inserted into the mortise and a wedge, with adhesive on it, is driven into the slit, forcing the tenon against the angled sides of the mortise. As you can see in Figure 5, this mortise cannot come apart.
Figure 5 - Mortise and tenon joint held in position with a wedge
Note: In some cases the wedge would be made of a different species of hardwood for aesthetic purposes.
Additional strength and aesthetics can be added to a standard mortise and tenon by placing a screw through the mortised piece of wood and into the tenon. The screw is countersunk into the piece of wood and a wood cap is placed over the countersink hole, as shown in Figure 6. This is a common method of reinforcing mortise and tenon joints on the arms of chairs.

Figure 6 - Mortise and tenon joint held in position with a screw
In place of a screw a hole can be drilled through the mortise and tenon and a hardwood dowel can be inserted into the hole to secure the mortise and tenon joint, as shown in Figure 7.

Figure 7 - Mortise and tenon joint held in position with a dowel
Note: Any holes drilled through a mortise and tenon joint should be done with the aid of a drill press, as shown in Figure 8, or drill guide attachment
, as shown in Figure 9 to ensure that the hole is perpendicular to the mortise and tenon joint.
